Exciting news from the team at Codia! 🌟 We're thrilled to announce that our groundbreaking Figma plugin, Design2Code, now supports direct conversion to SwiftUI! This marks a significant step in our mission to streamline the design-to-code process, and we're eager for you all to experience it.
1. SwiftUI Layout Introduction
SwiftUI provides a new way to build UI layouts with a declarative syntax, allowing developers to describe interfaces more intuitively and concisely.
Basic Layout Components
Text: The fundamental component for displaying text content.
Image: The component for displaying images, including how to load images from assets.
Button: Create interactive buttons and handle user tap events.
Layout Containers
HStack: A horizontal stack component used to arrange child views horizontally.
VStack: A vertical stack component used to arrange child views vertically.
ZStack: An overlay stack component used to layer child views on top of each other.
Space Distribution and Alignment
Spacer: Spacer is a view that occupies available space, automatically filling any remaining space to create gaps between adjacent views. Using a Spacer allows views to be evenly distributed either horizontally or vertically, with spacing automatically adjusted based on the available space.
Alignment: Use alignment parameters in HStack, VStack, and ZStack to position child views.
Building Complex Layouts
Group: Combine multiple views together to be treated as a single unit.
Divider: Add a line between views for visual separation.
GeometryReader: Read the size information of the parent view to dynamically adjust the layout of child views.
Lists and Scroll Views
List: Create list views to display static or dynamic collections of data.
ScrollView: Create a scrollable view container for content that extends beyond the screen boundaries.
Layout Priority and Flexibility
flexible() and fixedSize(): Control the size and expansion behavior of views.
layoutPriority(): Learn how to assign layout priority to views to resolve layout conflicts.
Custom Modifiers: Create custom modifiers to change the layout and appearance of views.
Responsive Layouts
Size Classes: Use different size classes to adapt to various devices and screen orientations.
Adaptive Views: Create views that adapt to screen size and environmental changes.
Container View Layouts
NavigationView: Create views with navigation capabilities, including managing the navigation bar and stack.
TabView: Create views with a tab bar for switching between different child views.
Layout Animations and Transitions
Animations: Add animation effects to make layout changes smoother and more engaging.
Transitions: Use transition effects to control the animation of adding and removing views.
Layout Performance Optimization
Lazy Stacks: Use LazyHStack and LazyVStack to delay the loading of off-screen views and improve scrolling performance.
Preloading and Caching: Understand how to preload and cache view content to reduce the overhead of layout calculations.
To discover more about SwiftUI Layout, click here to learn more.
2. How to use Codia figma plugin for SwiftUI
Taking the Codia Playground design draft as as example. Whether you turn on Dev Mode or not, Codia support both.
2.1. Dev Mode
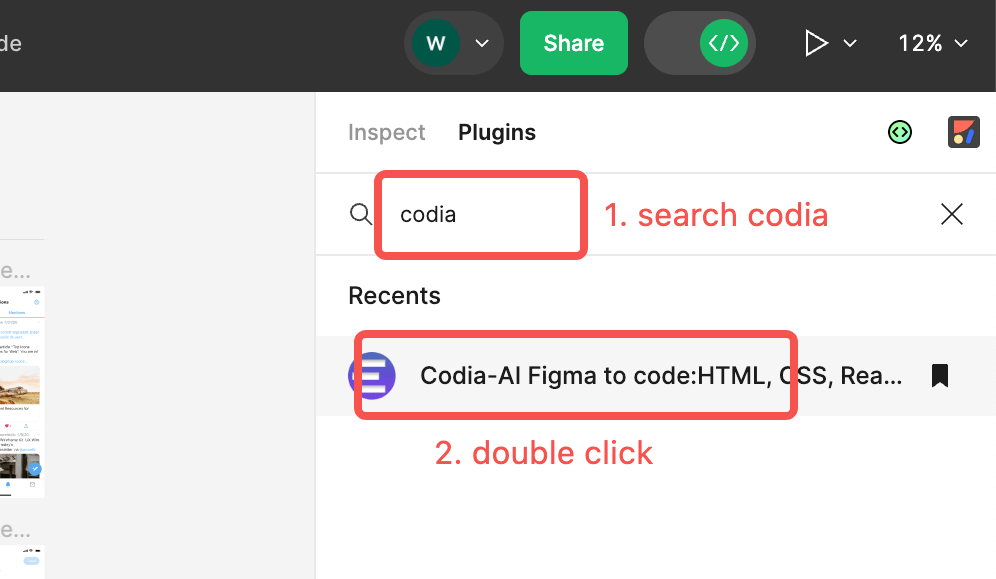
In the upper right corner of the browser, search codia, and then double click Codia-AIFigma to code plugin to run it.
2.2. Disable Dev Mode
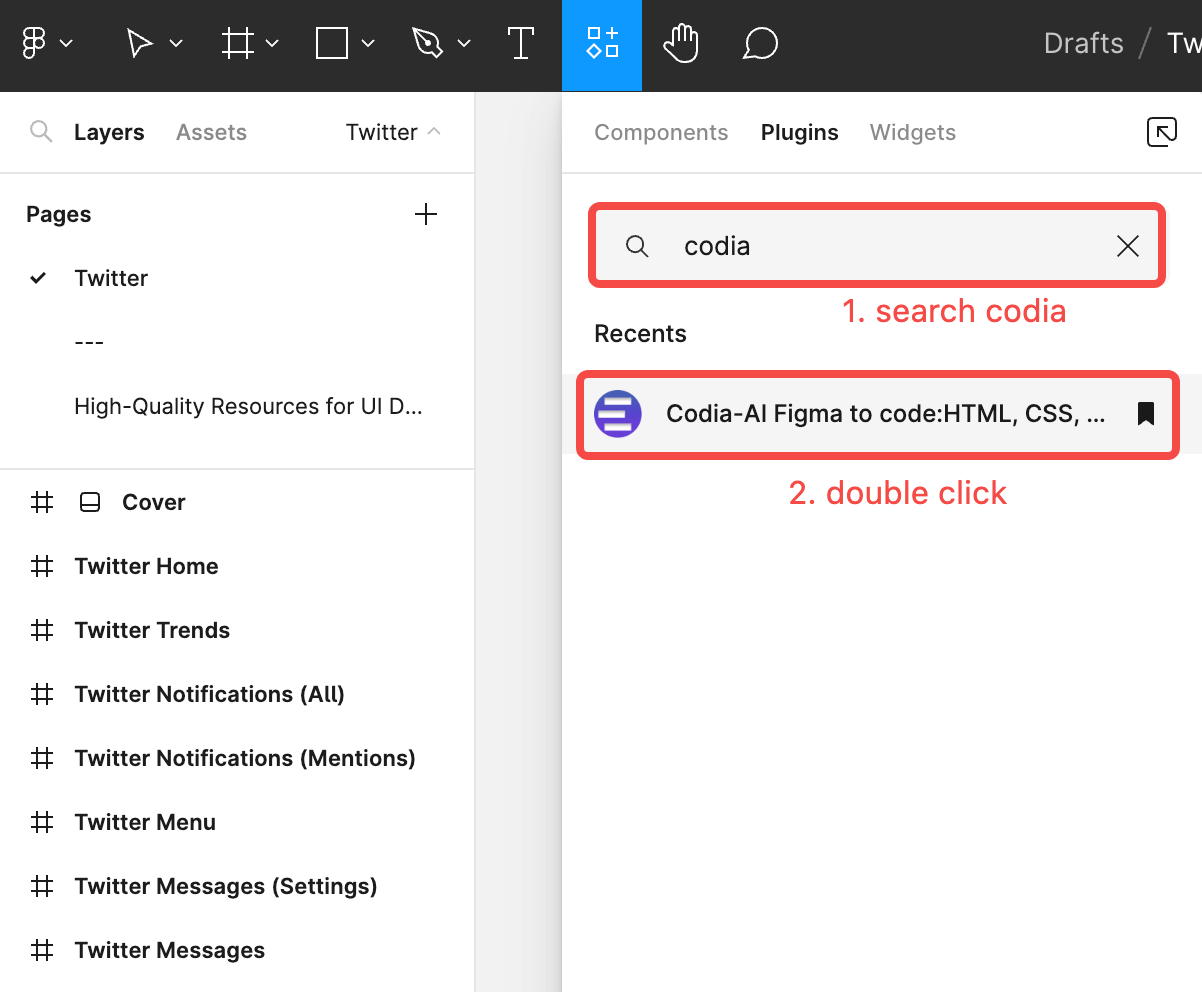
In the upper left corner of the browser, search codia, and then double click Codia-AI Figma to code plugin to run it.
Whether or not Dev Mode is turned on affects where you find plugins. When turn on Dev Mode, look for the codia plugin in the upper right corner of the browser. When turn off Dev Mode, look for the plugin in the upper left corner of the browser.
2.3. Run Codia In Figma
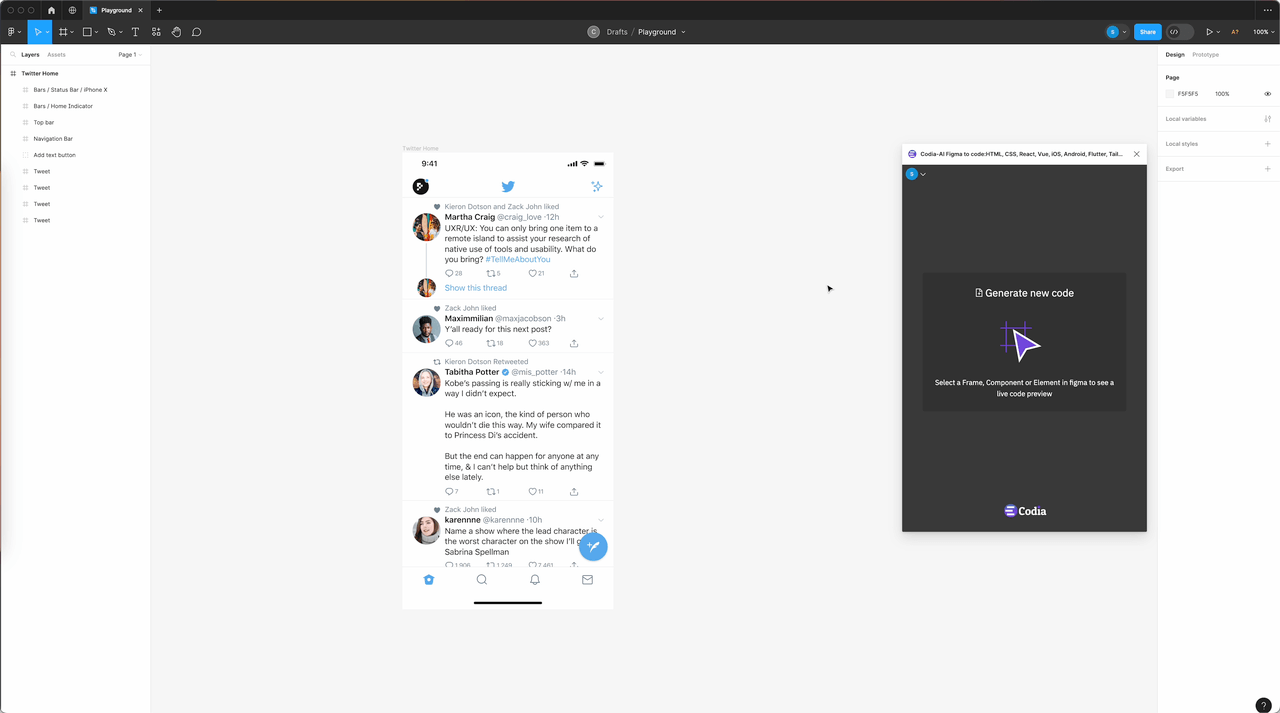
Double click the Codia plugin to run the plugin. The running effect is as shown below.
2.4. Select Figma Draft
Select the figma design draft to generate code. It is recommended to select a complete part, like a login page or a chats page, but you can also select only a certain UI element.
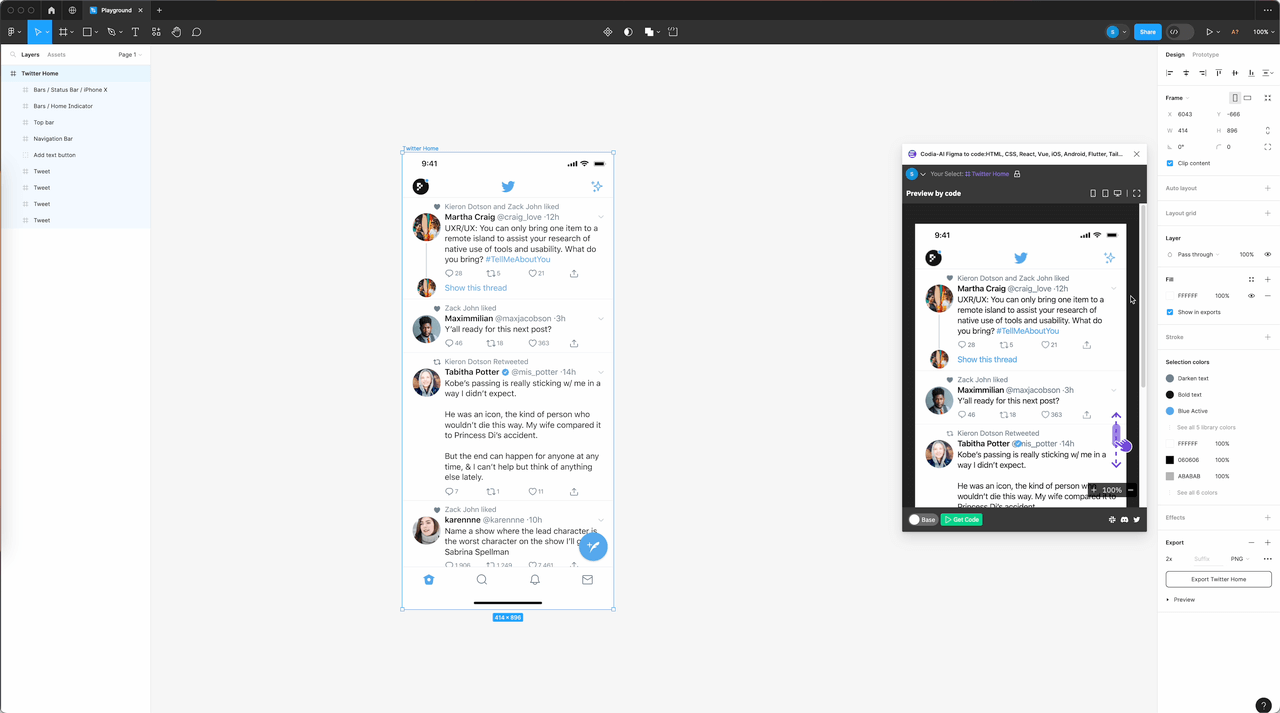
A preview of the selected UI element can be seen in the "Codia AI Figma to code" plugin. Click the "Lock" icon above the plugin to unlock it, and then select other UI elements to switch the preview object.
As shown below:
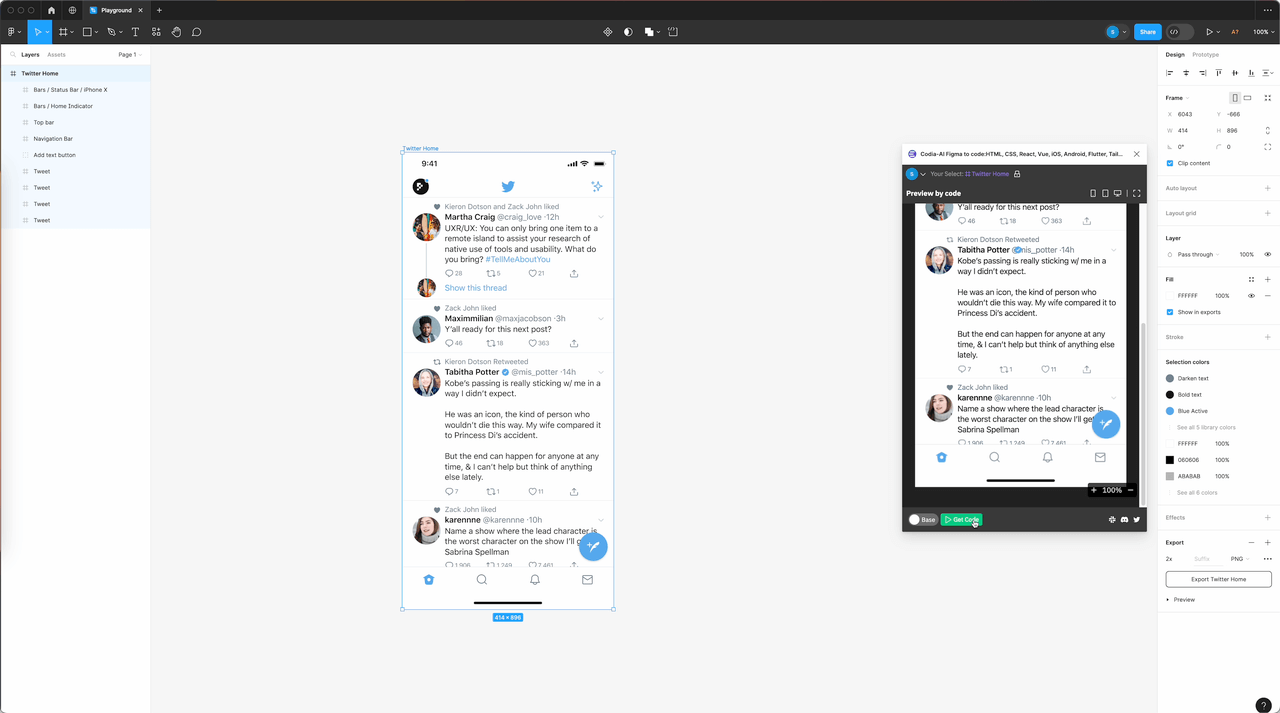
2.5. Click Get Code
Click the green "Get Code" button below the "Codia AI Figma to code" plugin to start generating code, as shown in the figure below:
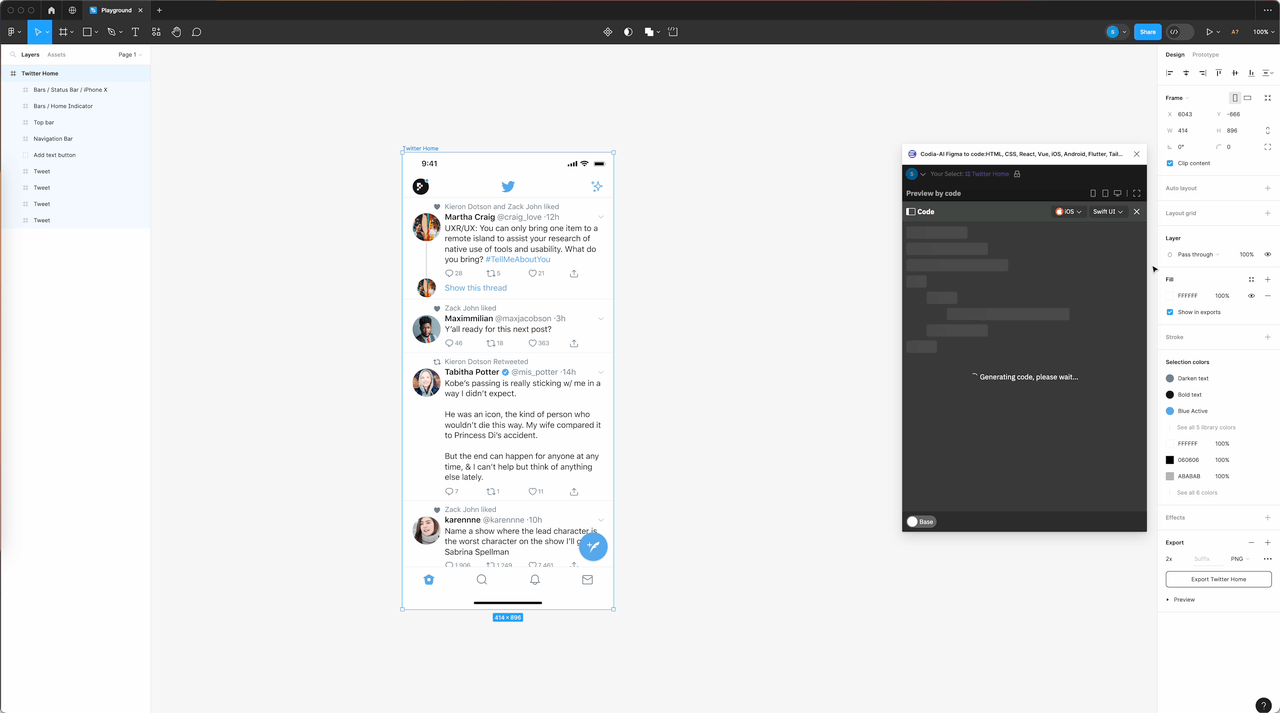
2.6. Switch to iOS->SwiftUI
You can switch the language above the pop-up floating layer. We switch to SwiftUI for iOS, as shown in the figure below:
2.7. Code Generation Begin
Code generation will begin, as shown below:
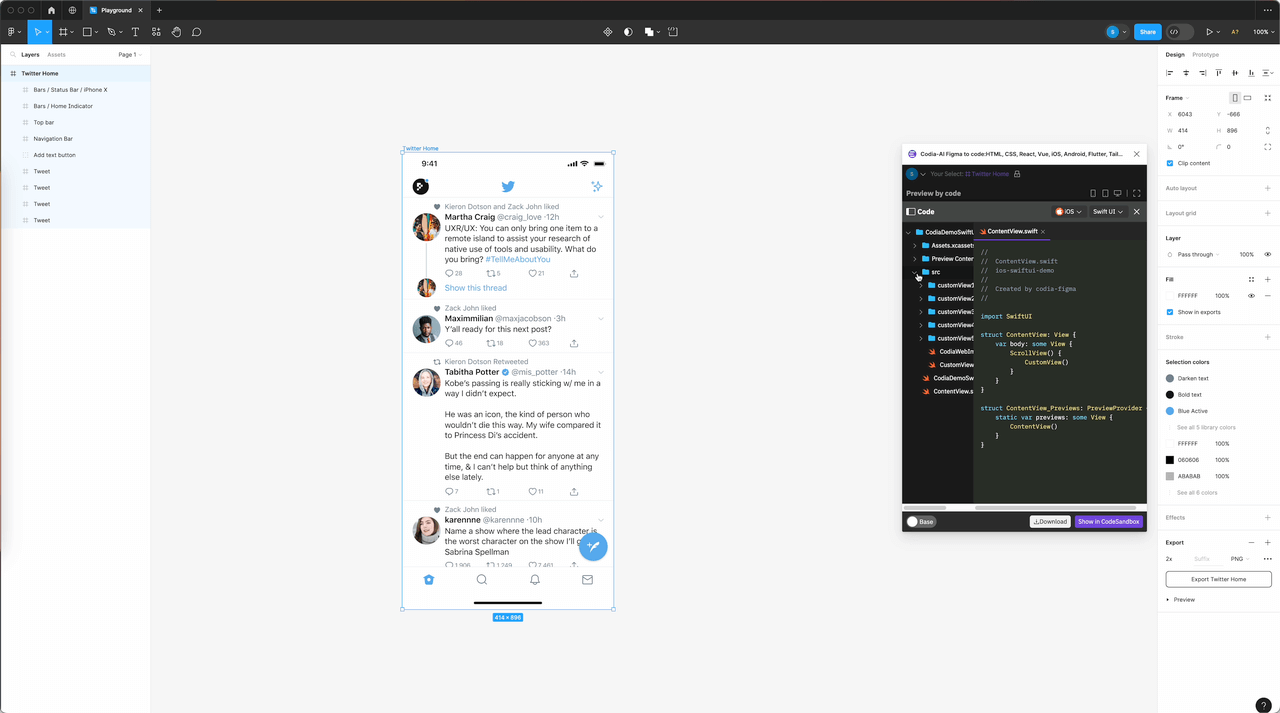
2.8. Generated Source Code
Wait a moment for the code to be generated. This is the Codia Base Mode code. You can switch to Codia AI Mode in the lower left corner of the plugin to generate AI-optimized code.
Expand the file tree on the left and you can see all code files, as shown in the figure below:
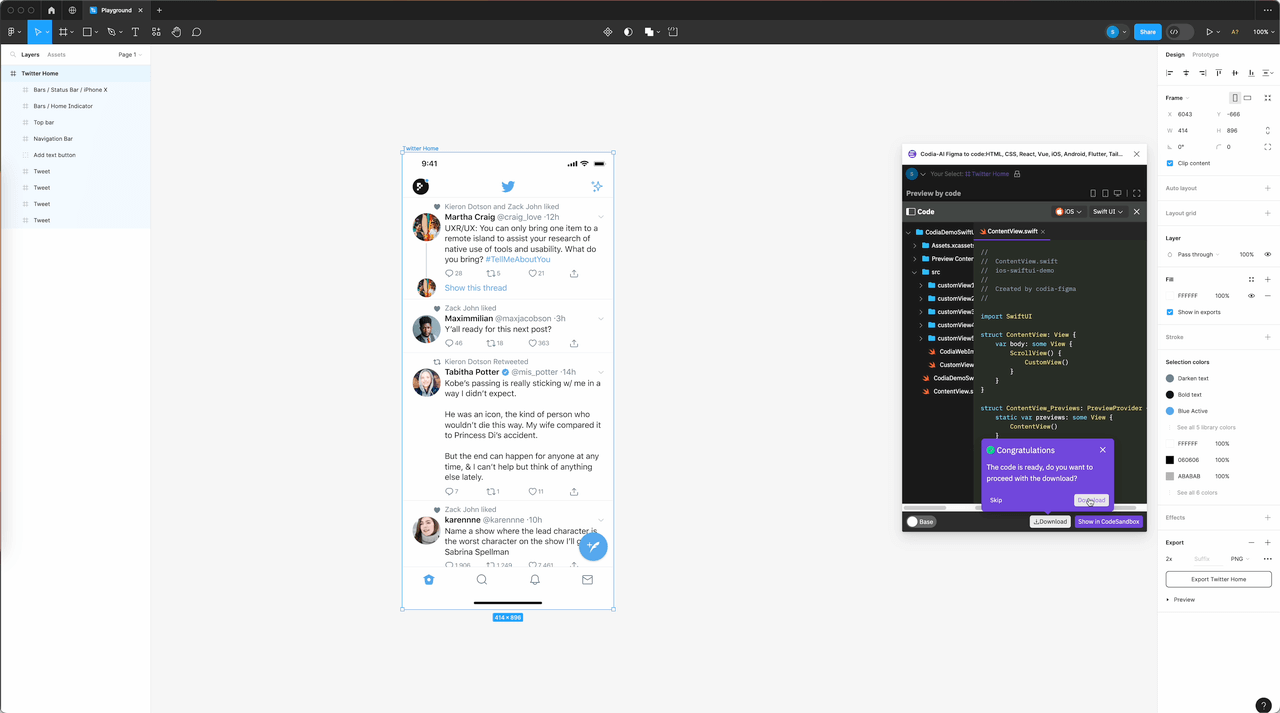
2.9. Download Source Code
Click the "Download" button below and click "Download" in the pop-up bubble to download the code. The code can be downloaded locally. It also supports "show in codesandbox" to preview codes in codesandbox. As shown below:
2.10. Run locally
After the download is complete, you will get a zip file starting with "CodiaDemoSwiftUI", unzip it. As shown below:
After unzip it, then open "CodiaDemoSwiftUI.xcworkspace" with Xcode. SwiftUI Compiler Environment requires Xcode 12.0 and above to be installed. This is Apple’s official page. Please register your Apple ID first and log in in Xcode (Log in in Xcode - Setting - Accounts ) to compile the generated code. As shown below:
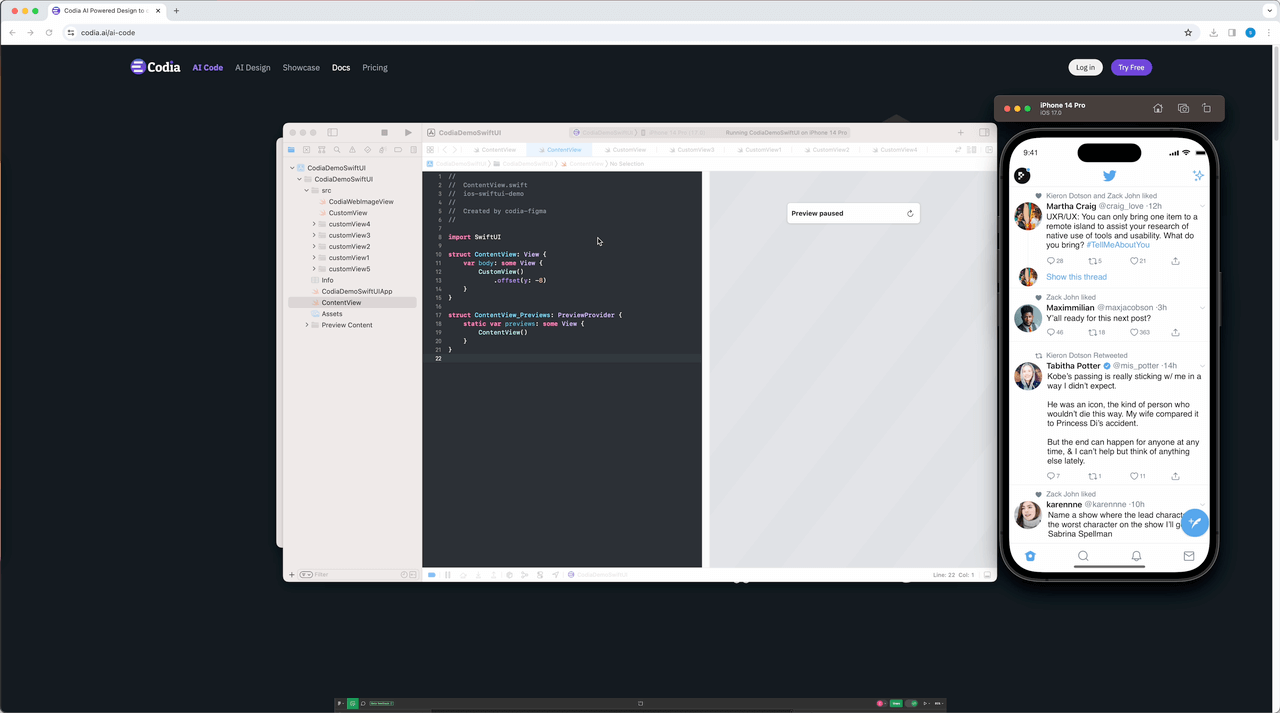
Compile in Xcode and you can see the generated effect. Before this, you may need to log in to your Apple ID in Xcode. As shown below:
3. Why Design2Code for SwiftUI?
Boosted Efficiency: Enjoy more than a tenfold increase in your workflow productivity. Transform your Figma designs into high-quality, SwiftUI-ready code in mere moments!
Precision Through AI: Powered by our "Intelligent Twin Engine", Design2Code understands and converts designs with unmatched accuracy.
Developer-Friendly Code: The output feels human-made, clean, and efficient, aligning perfectly with developer needs.
Full-Stack Versatility: Beyond web platforms, Design2Code is your go-to tool for mobile app development, now including SwiftUI.
Exclusive Beta Access - Absolutely Free!
Dive into the future of design conversion with our beta phase, currently open and free for all users.
Your feedback is crucial; our support team is ready to assist with any issues, ensuring a smooth experience.
As a team rooted in Singapore's tech hub, we at Codia are committed to revolutionizing software development with AI. "Figma to SwiftUI" is our latest innovation, embodying our vision of empowering developers with smarter tools.
We invite you all to join our beta program and help shape the future of design-to-code conversion. Your support and feedback are invaluable to us.
Thank you for being part of this innovative leap forward in AI-powered development. We can't wait to see what you'll create with Design2Code for SwiftUI!
Happy Coding,
The Codia Team 🌐✨
Codia announces Design2Code, an AI Figma plugin for converting designs to SwiftUI code, enhancing workflow efficiency and supporting full-stack mobile app development.
About The Author
Emma Rodriguez
Mobile Development Expert with expertise in Flutter and React Native